How to Turn OceanWP Multilingual with WPML
OceanWP is a lightweight and customizable multi-purpose WordPress theme. It’s also fully compatible with WPML, making it possible to build multilingual websites.
Note: this document has been updated to reflect the latest WPML plugin upgrade, starting from version 4.8
Start by making sure you have the following installed and activated on your site:
Getting Started with WPML
Once you activate WPML a simple setup wizard begins. It helps you register WPML, choose your site’s languages, select the URL format, and set who will translate content.
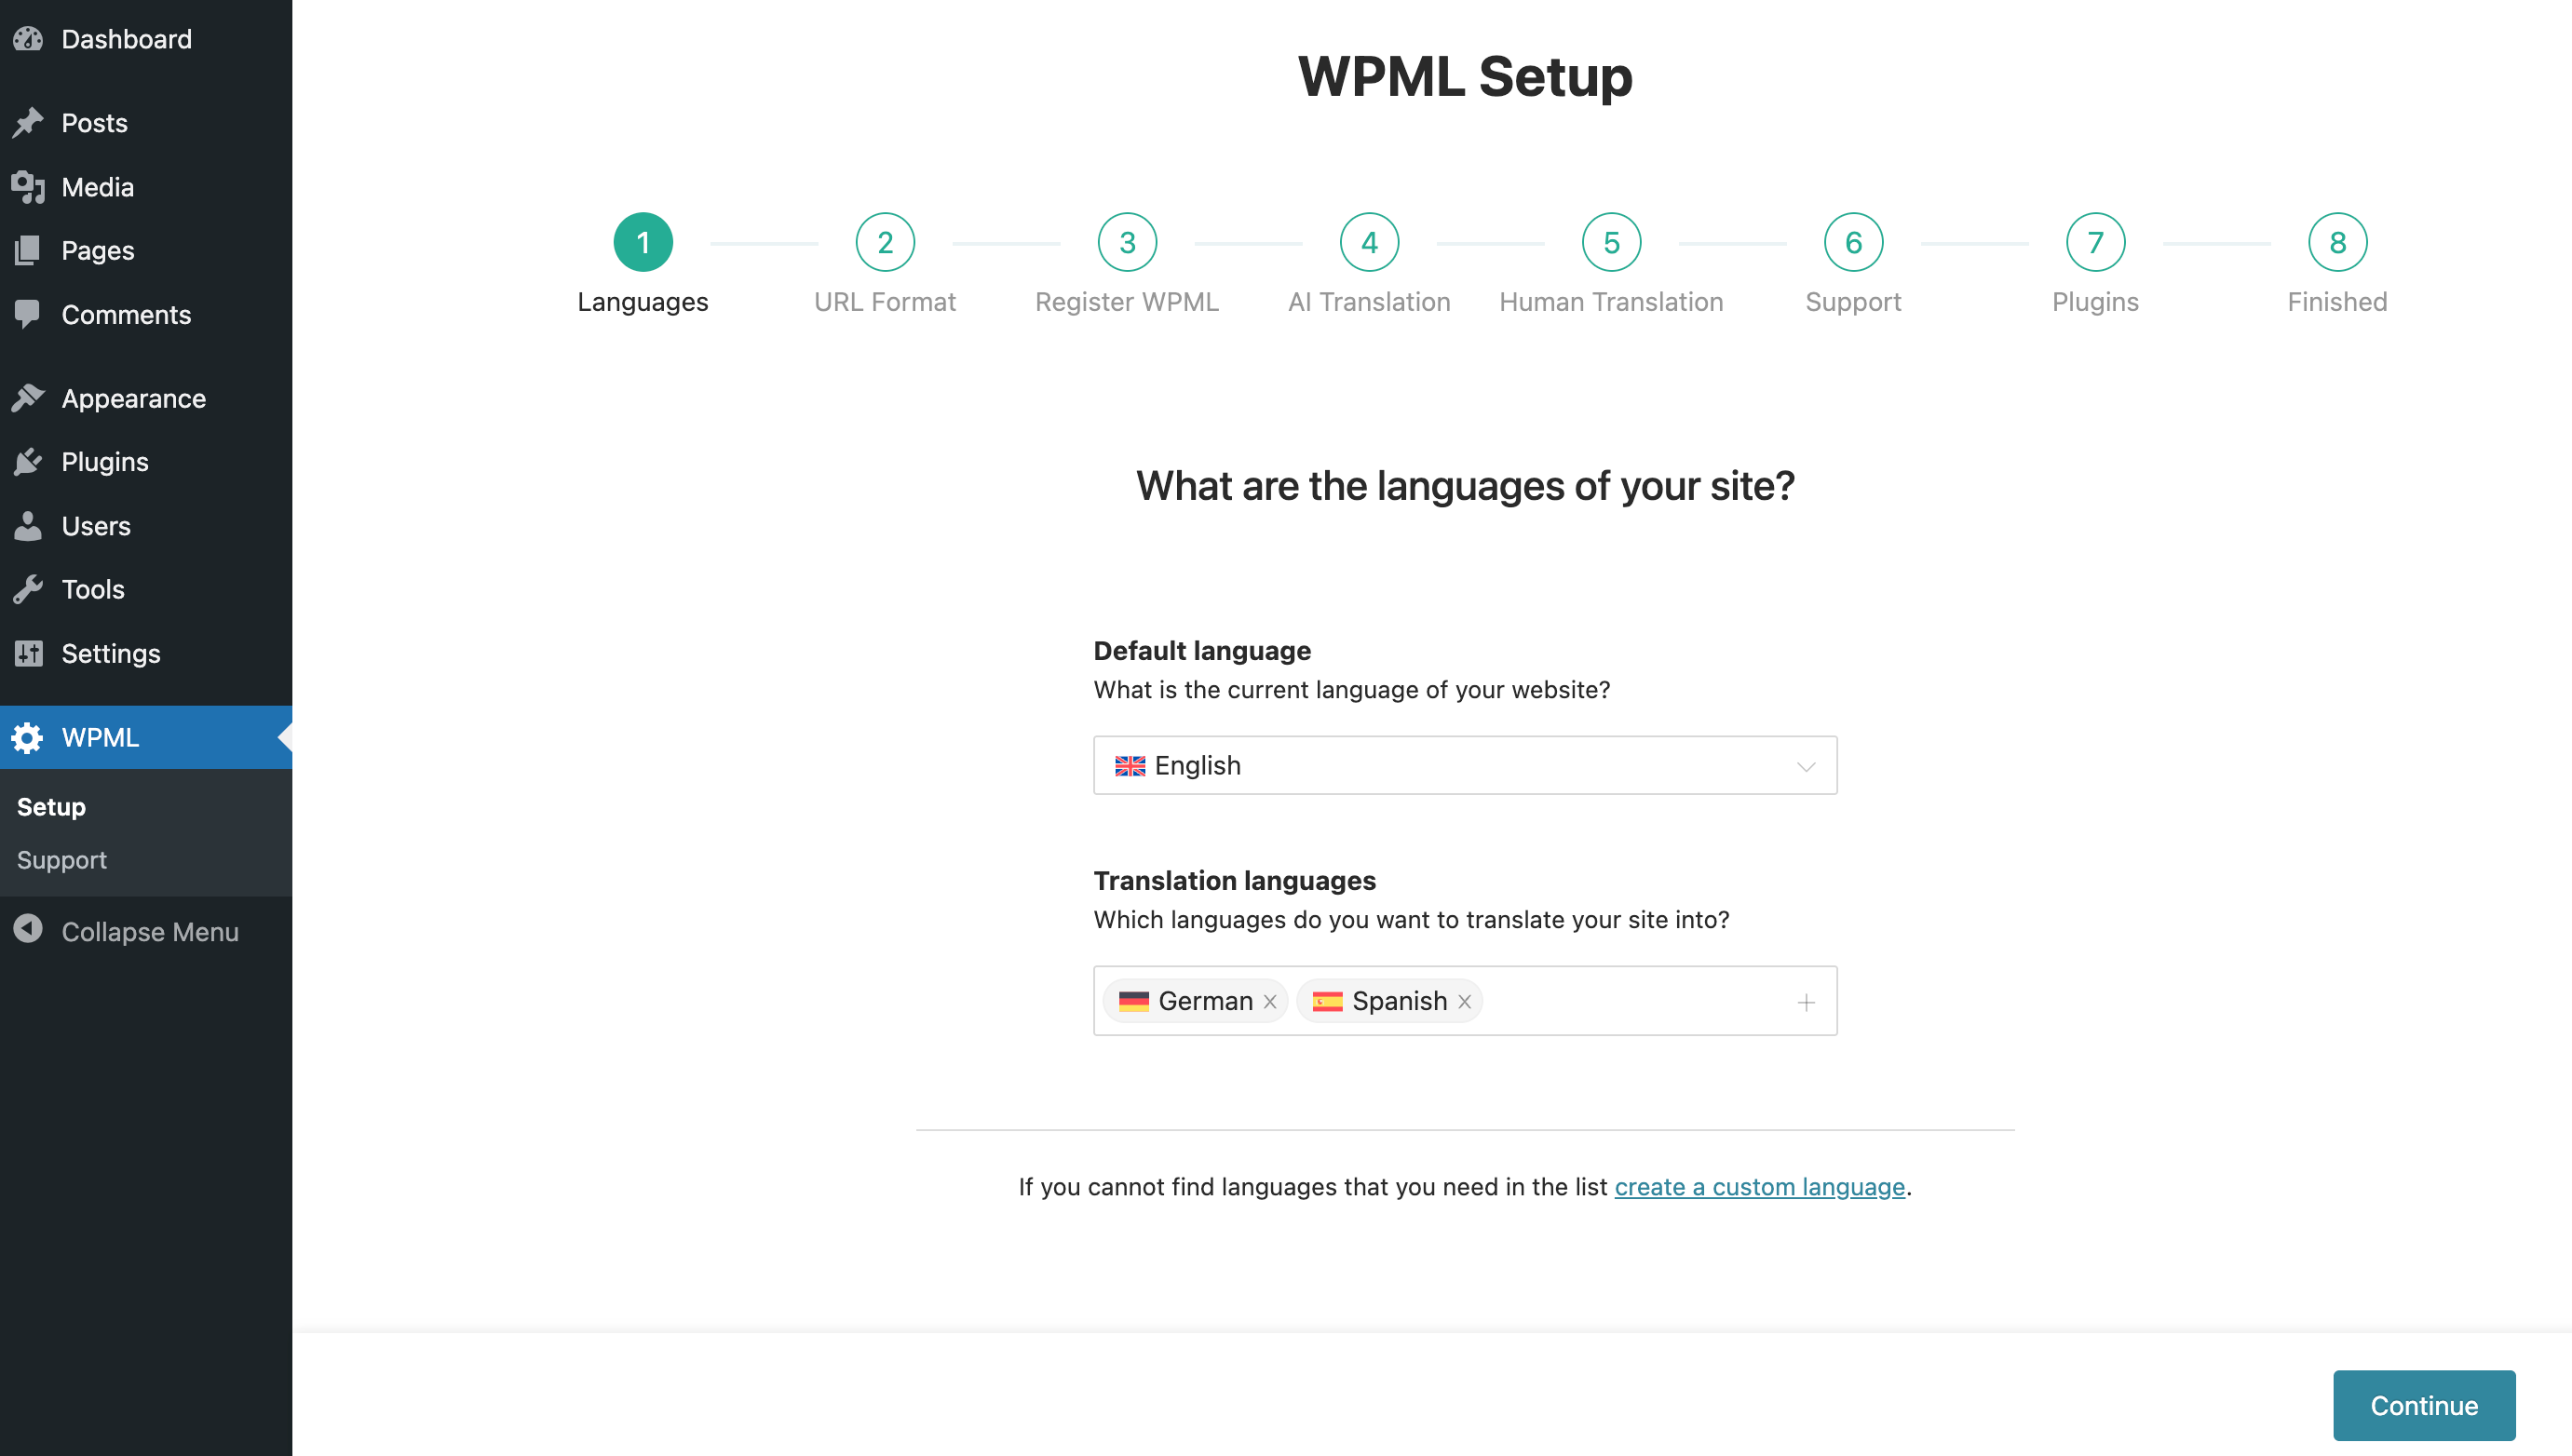
The wizard also asks for some key context about your site and target audience. This context is used by WPML’s proprietary AI translator, the Private Translation Cloud (PTC), to deliver the best quality translations.
According to the WPML team, PTC is the most advanced AI translator available. It’s like having a team of translators with a deep understanding of your content and niche. PTC even comes with a quality guarantee: if you’re not satisfied with the translation, you get a refund.
Additionally, WPML's setup wizard helps you automatically install any addons based on which plugins you have installed. For example, if the wizard detects your site is running WooCommerce, it will allow you to automatically install the WPML Multilingual & Multicurrency for WooCommerce addon, all with a single click.
Translating Your Content
WPML lets you translate all parts of your website from a single page in your admin - the Translation Dashboard.
Translation Dashboard displays sections with lists of all types of content on your site, including:
- Pages
- Posts
- Products
- Portfolios
- Forms
… and any other types of content that are translatable.
To send content for translation, start by selecting the items you want to translate in the Pages, Posts, Portfolios, and other sections.
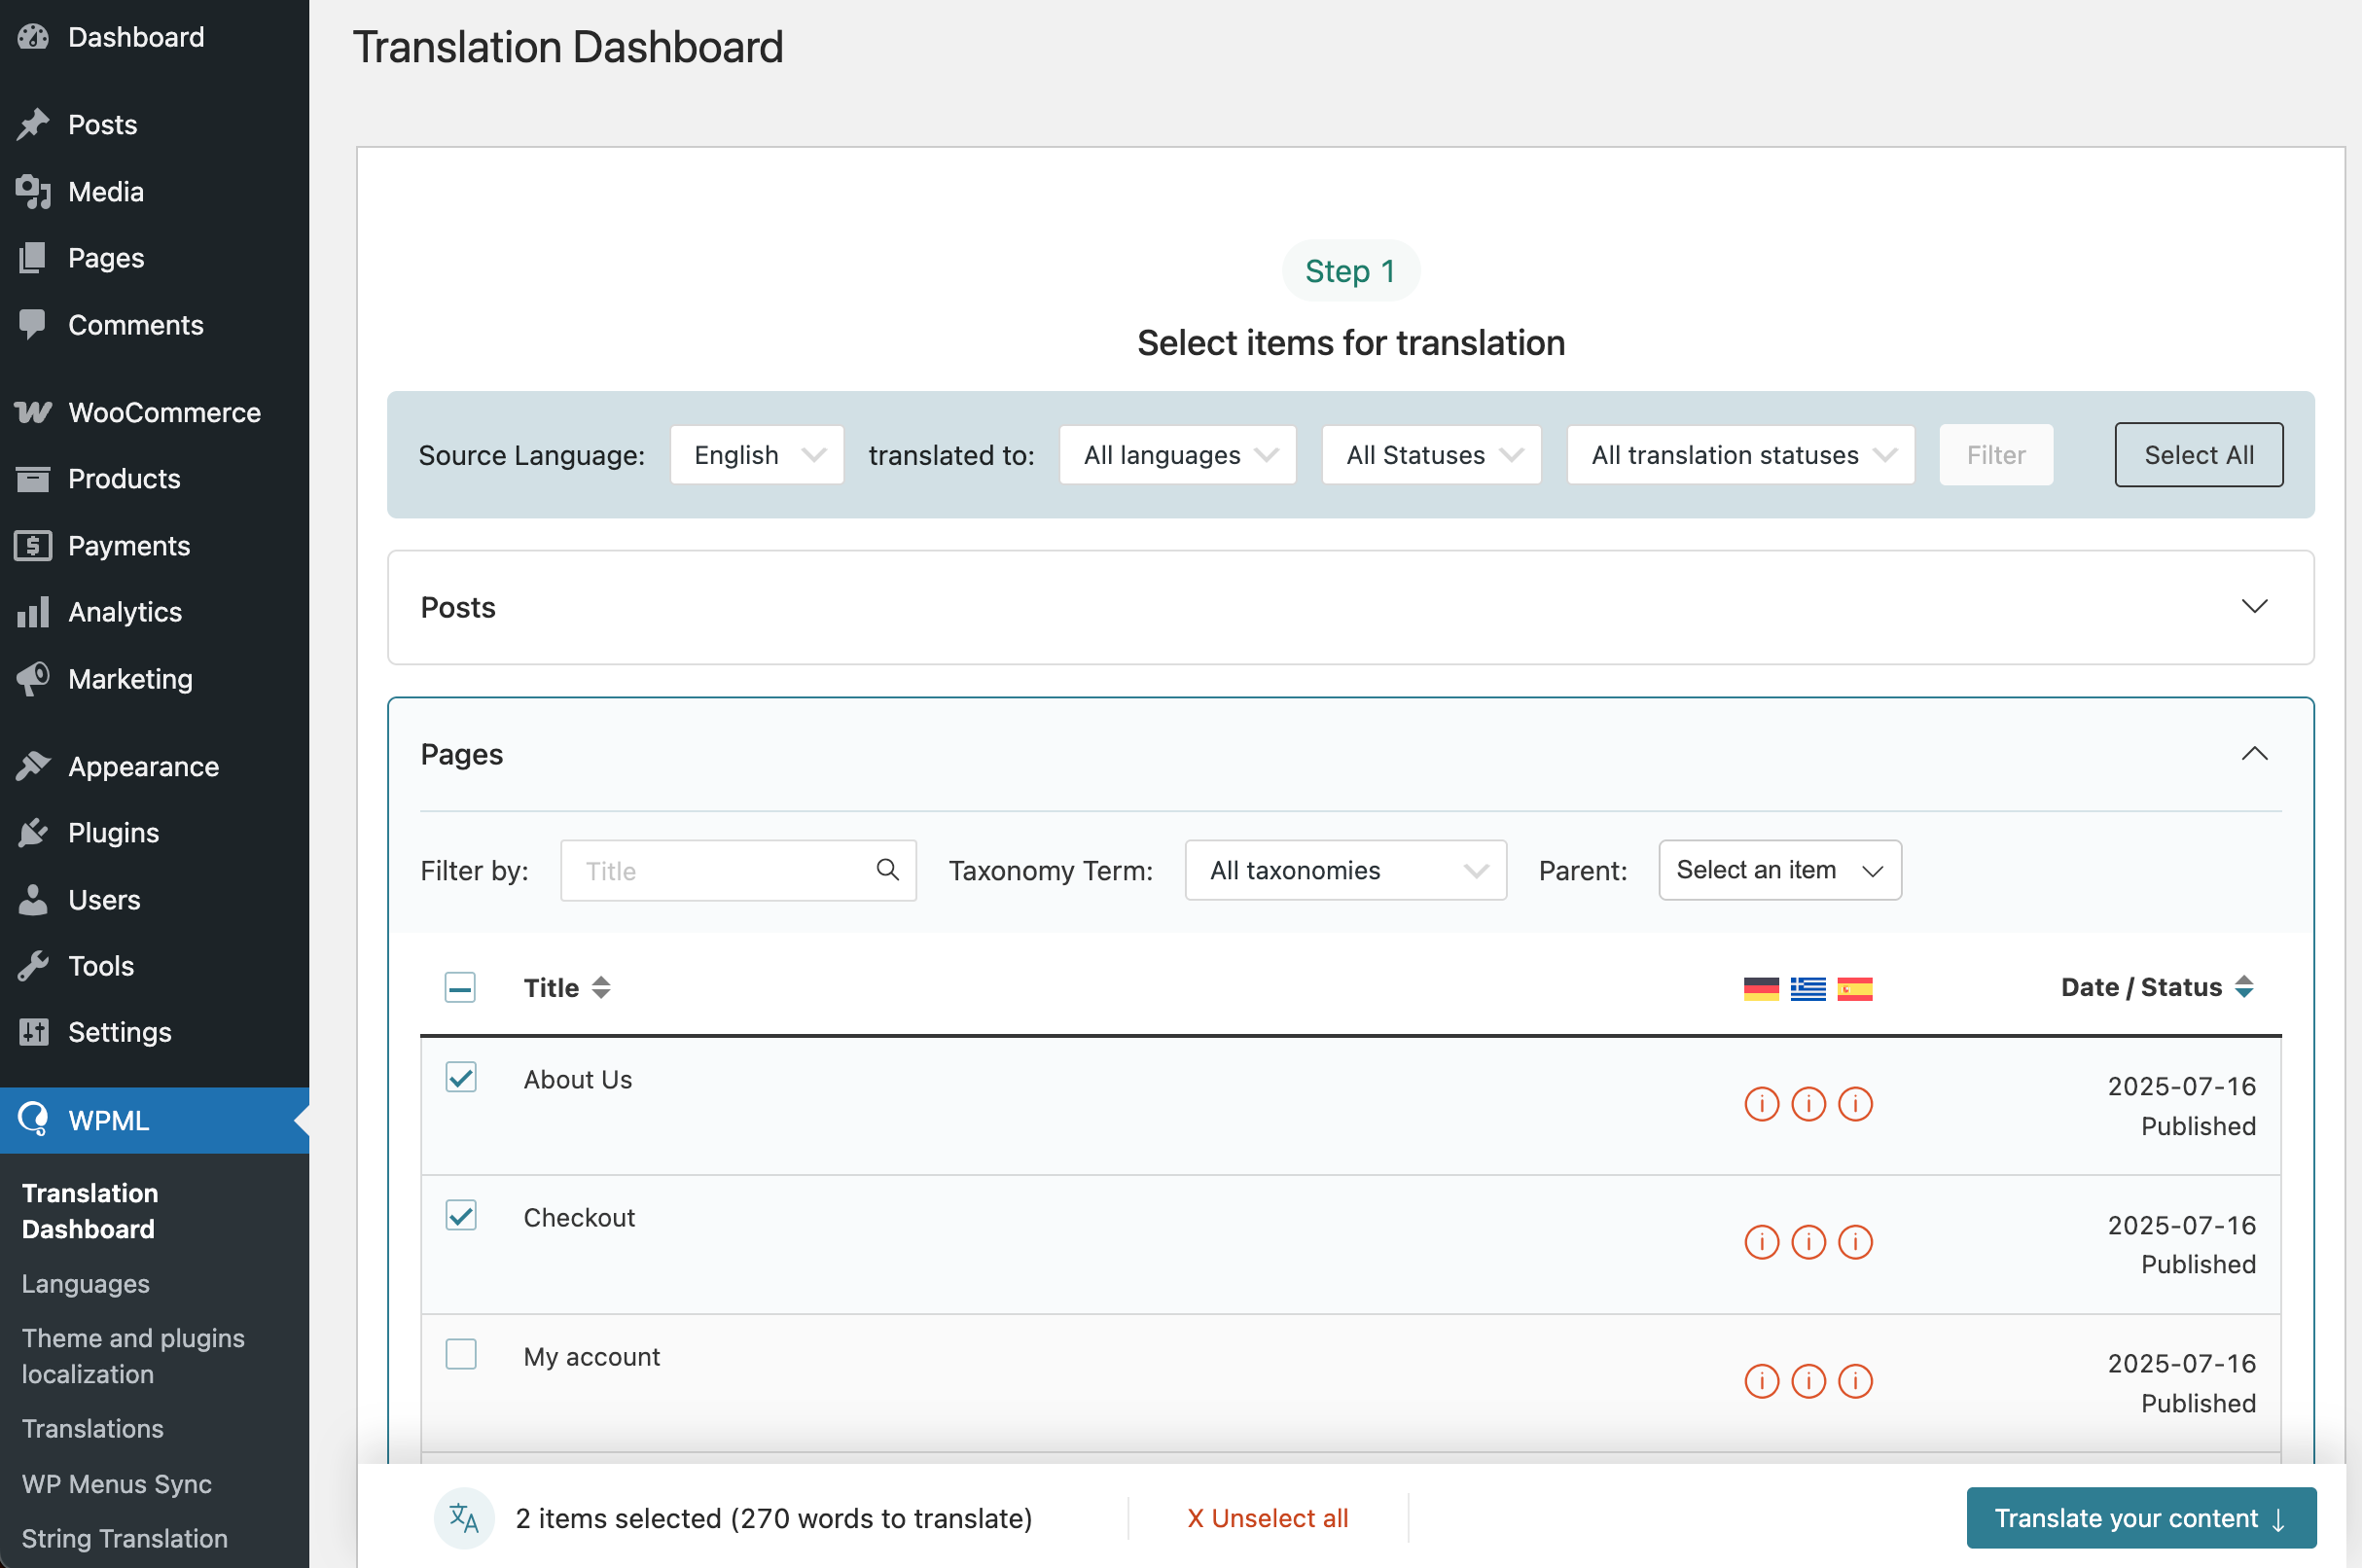
If you don't see sections for Portfolios or other custom post types in the dashboard, go to WPML → Settings and set those post types to Translatable.
Next, scroll down to the Translate your content section and select how to translate.
With WPML, you can translate by yourself, using other translators, or automatically using machine translation, like PTC.
When using AI, you can see how many credits you’ll spend for translating the content you selected, and their cost. One credit costs €0.00059 so translating a typical delivery policy page with around 100 words in 3 languages costs €0.92. (the pricing cost and calculations have been provided by the WPML team)
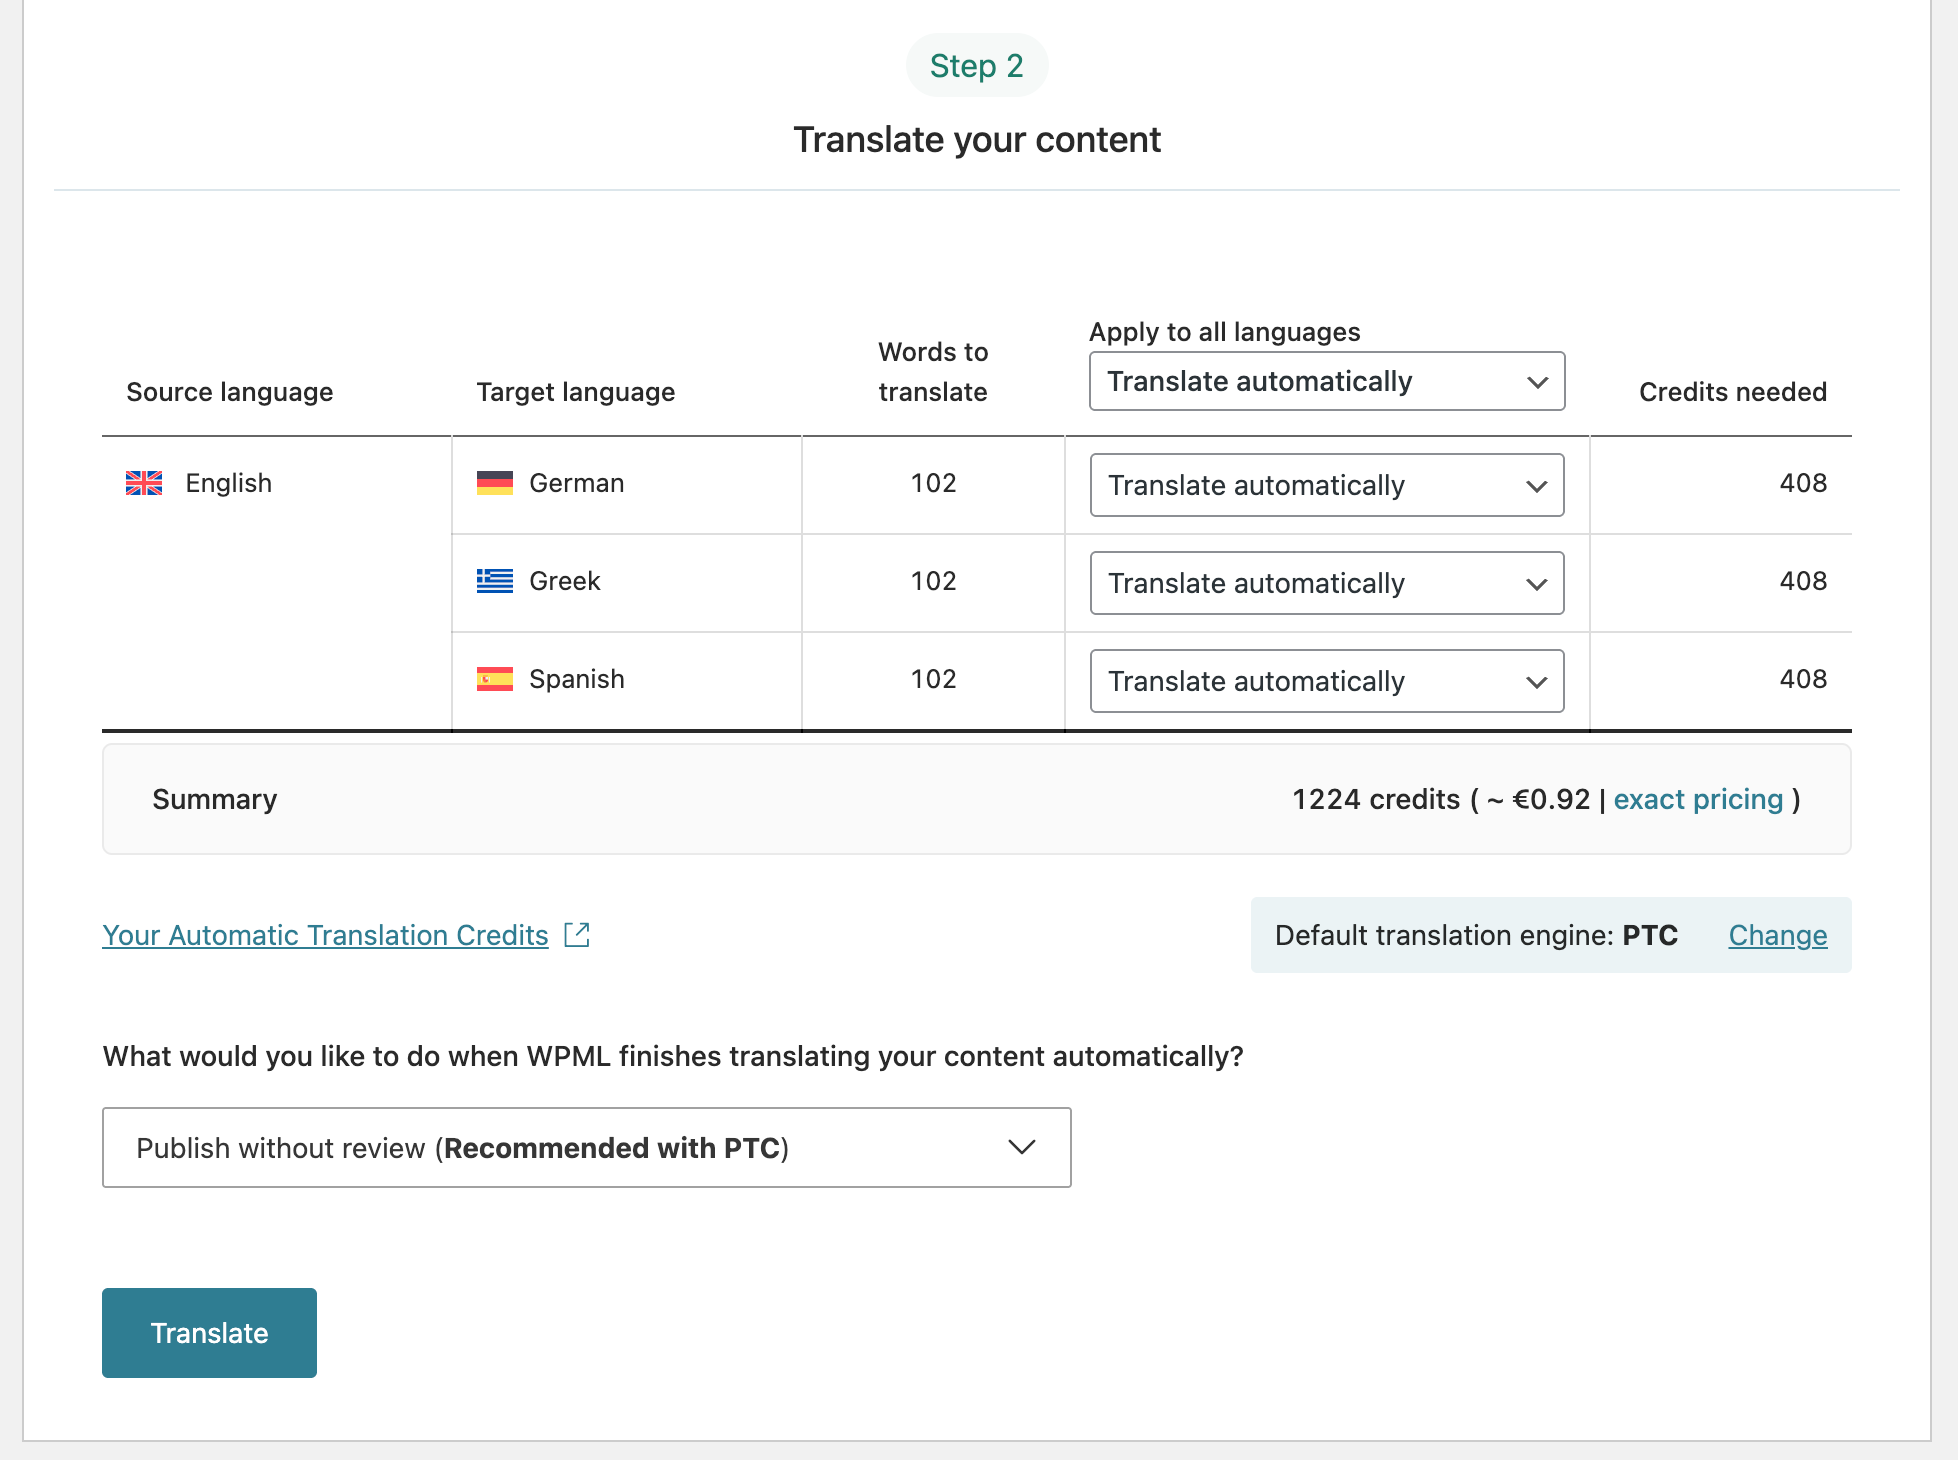
After selecting the translation method click the Translate button.
To see all translations you’ve sent via the Dashboard, go to WPML → Translations.
Whenever you want to edit translations, visit the translated page in a secondary language while logged in your WordPress account. Click on Edit translation from the top menu to enter WPML’s Advanced Translation Editor.

When done, you can visit the content on the front-end and confirm it's been fully translated.


Translating Your WooCommerce Store
With WPML, you can completely translate your OceanWP-powered WooCommerce store. This includes using multiple currencies, translating your products, variations, categories, shipping classes, and more.
Start by installing WPML Multilingual & Multicurrency for WooCommerce plugin. After activating it, finish a short setup wizard. It helps you translate your store pages, set currency options, and more.
You can then translate your products just like any other content on your site. Go to the WPML Translation Dashboard and scroll to the Products section. Select the products you want to translate, set a translation method, and send to translation.
After the translation is done, you will see your products translated on the front-end.

Translating Categories, Tags, and Other Taxonomies
In WPML, Categories, Tags, and other taxonomies are translated along with the content they apply to. For example, all post Categories are translated when you translate your posts.
Translating Menus
WPML allows you to translate your WordPress menus in a few ways. As menus link to various pages on your site, it's important to start by translating your content and then taking care of custom links in your menus.
In general, WPML provides three ways to translate your menus:
- Automatically, let WPML create the translated menus for you
- Manually, so you can choose to have different menus in your site’s default and secondary languages
- Using WPML's WP Menus Sync tool, which syncs the menu structure from the default language into the site’s secondary languages
You can find a detailed explanation of each option in WPML’s documentation about translating menus.
Translating Texts from OceanWP Theme, Plugins, and Other Places
Your site is made up of more than the content in your posts and pages. There are also various other texts coming from the themes and plugins installed on your site.
For example, let’s say you have some text in your site’s footer. After translating the post, you’ll still see the text as untranslated:

WPML makes translating such texts easy from the Translation Dashboard.
Once there, scroll down to the Other Texts (Strings) section and look for the text you want to translate. Select it, choose the translation method, and click Translate.

If the text is not listed, simply visit that page on the front-end in a secondary language. By default, WPML automatically registers all strings when you visit the related pages in a secondary language. Then, go back to the Other Texts (Strings) section and send the newly registered strings for translation.
Here’s the translated footer text on the front-end:

Translating Texts from the OceanWP Child Theme
If you are using the OceanWP child theme, you may want to translate custom theme elements. You can learn more by visiting our page about Translating Texts from the OceanWP Child Theme with WPML.
Translating Custom Templates
Ocean Extra allows you to create custom OceanWP templates. To learn how to translate these templates, see the page about Translating Custom OceanWP Templates with WPML.
Using OceanWP Extensions with WPML
To add more features to your site, you can purchase the OceanWP core extensions bundle which includes all premium OceanWP plugins.
To learn how to translate the content coming from OceanWP extensions, see WPML’s documentation page about OceanWP Extensions Compatibility with WPML.