How To Use Waitlist (Waiting List)
Welcome to your Ocean eComm Treasure Box!
The Waitlist feature is available as of Ocean eComm Treasure Box 1.4.0 version.
The Waitlist feature adds brand new functionality to your website and serves to increase sales and save the day.

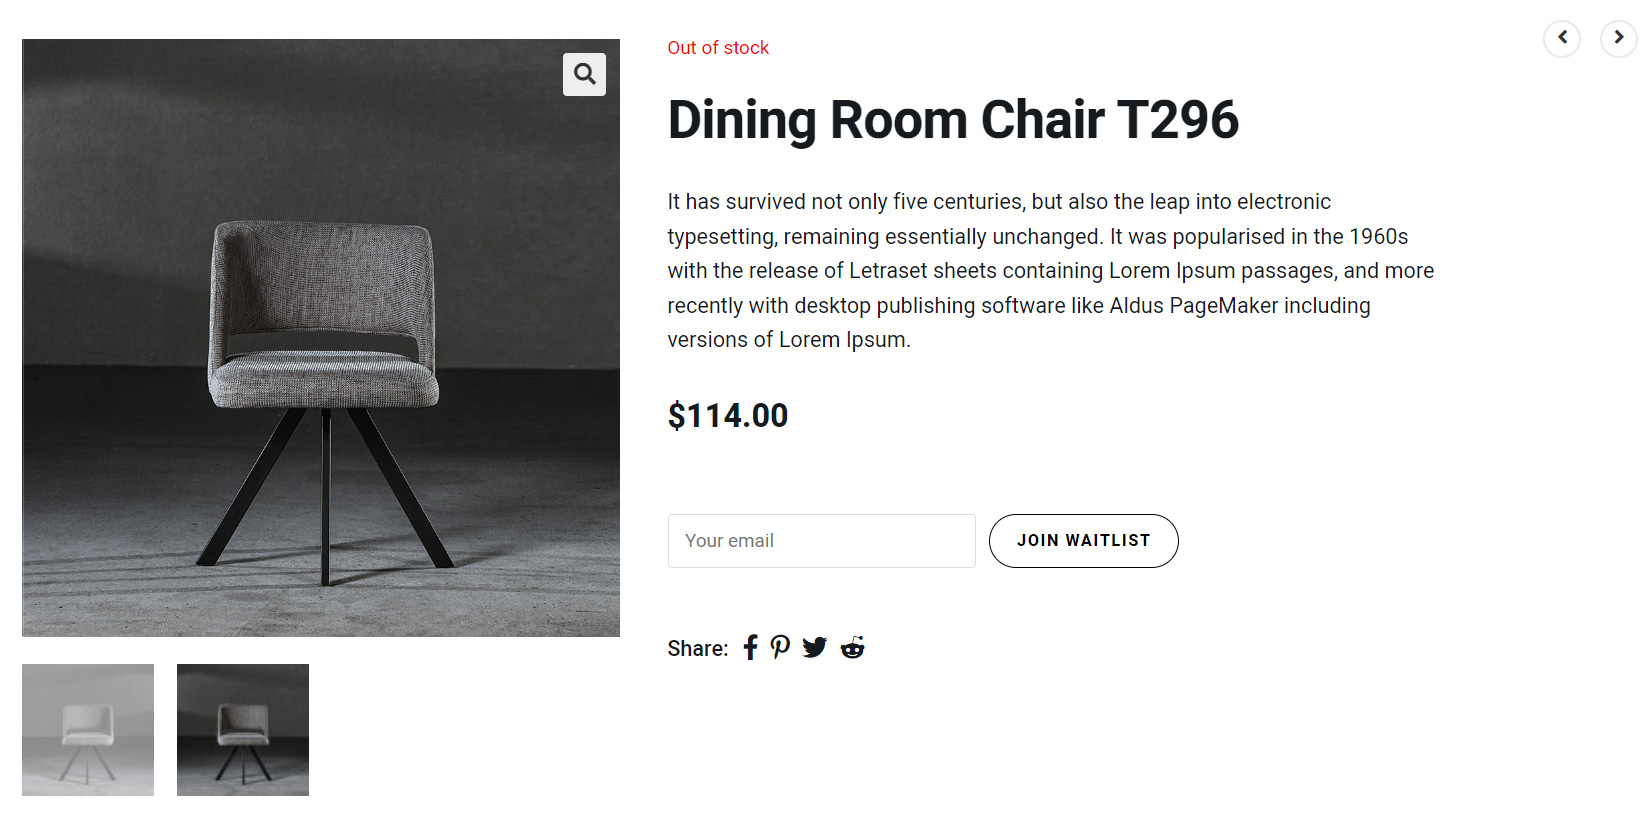
If a product is out of stock, the Waitlist feature allows users to subscribe to the waitlist:
- logged in customers will see a button (to subscribe to the waitlist / add the product to their waitlist),
- logged out customers will see a subscribe form (similar to the newsletter subscription form).
Once the product in question is back in stock, an email notification is sent to users who subscribed (added the product to their waitlist).
The Waitlist feature can be used on both default single product pages and custom template single product pages.
Enable the Waitlist Feature
To enable the Waitlist:
- Navigate to your eCommerce OTB dashboard,
- Go to the Modules tab,
- Click the cog icon next to the Waitlist option,
- Toggle the Enable Module option,
- Configure desired options (explained below), and
- Save Changes.


Waitlist (Waiting List) Settings
The OceanWP Waitlist module for WooCommerce includes the following settings:
- Enable module (enable or disable the Waitlist feature),
- Email Template (choose the desired emailing method, more about this topic below),
- Email Title, related to the Email Template, see more info below,
- Email Content, related to the Email Template, see more info below,
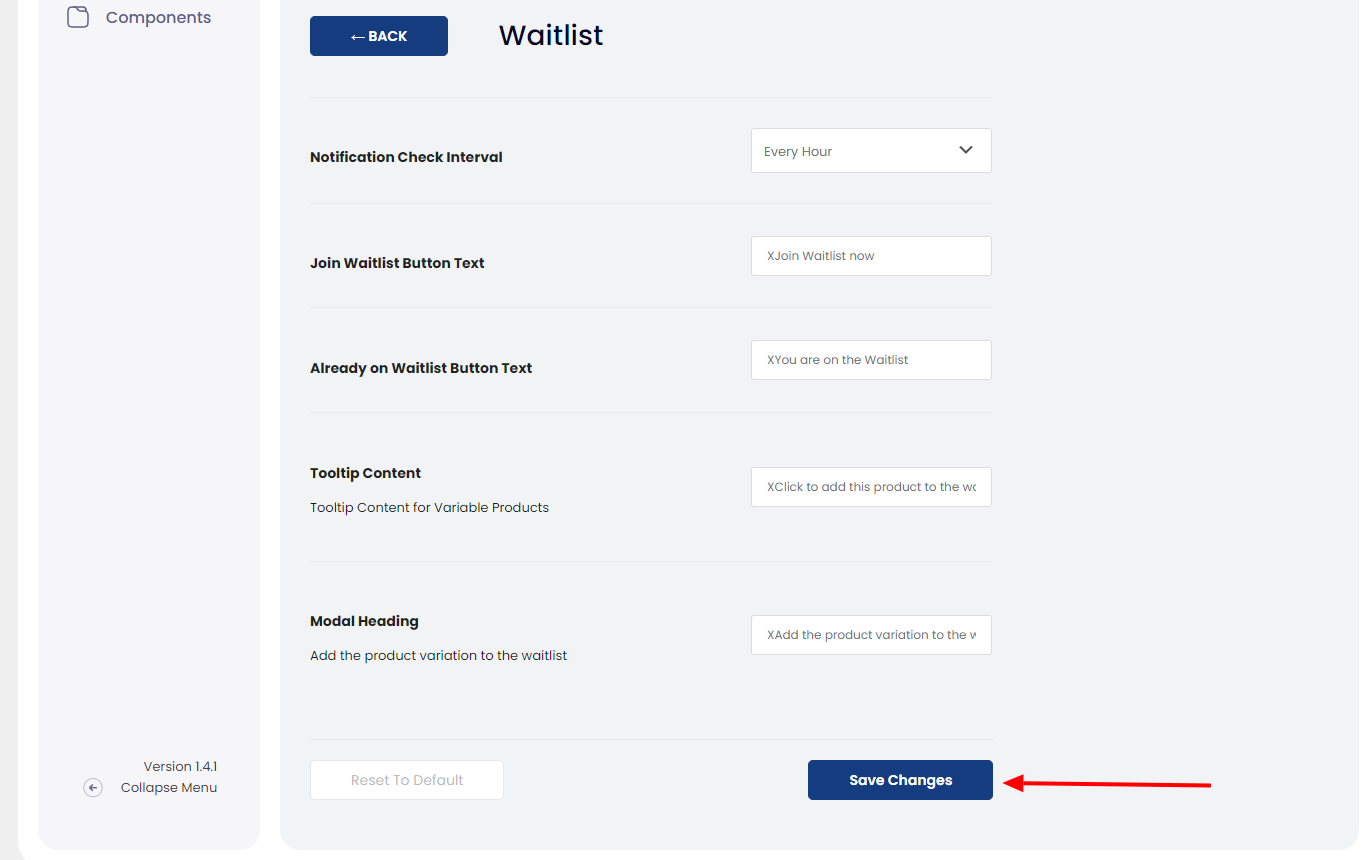
- Notification Check Interval: choose how many times should the Waitlist cron job check if out of stock articles added to the Wishlist have become available. Default option is Every Hour, followed by Twice a Day and Once a Day.
- Join Waitlist Button Text: alter default button text,
- Already on Waitlist Button Text: alter default text which indicates the product is already added to the Waitlist,
- Tooltip Content: functions only in conjunction with the Product Swatches module, and in case the Disable Out of Stock Variations option is enabled. Tooltip Content is a piece of text that appears if a customer hovers over a product variation unavailable at the moment of purchase and encourages them to take action and add the specific product variation to the Waitlist.
- Modal Heading: change the heading of the popup which appears if a customer decides to add a specific out of stock variation to the Waitlist. Functions only in conjunction with the Product Swatches module, and in case the Disable Out of Stock Variations option is enabled.
Apply your settings for the WooCommerce Waitlist and don't forget to Save Changes.
Waitlist Email Templates
After enabling the Waitlist module, you need to select the desired email template.
The Ocean eComm Treasure Box supports 2 email templates:
- Editor: plain and simple email format which you can configure directly in the Waitlist option, and
- WooCommerce: this will send out an email using the WooCommerce email format which you can configure independently.
The Editor Email Template for WooCommerce Waitlist
Using the Editor email template allows you to configure the simple email directly in the Waitlist option of your eCommerce OTB dashboard:
- Email Title: This is the email subject. Add a text you want your customers to see in their mailbox.
- Email Content: Add content for your customers to ready (email body text).
Hint: By using the '%s' variable in the Email Title or Email Content, product(s) that is back in stock will be mentioned by the product title (product name) automatically.
Example: Product %s is back in stock!

The WooCommerce Email Template for WooCommerce Waitlist
Using the WooCommerce email template will send out an email notification using the WooCommerce style.

To manage the WooCommerce email template:
- Navigate to your WordPress admin dashboard,
- WooCommerce > Settings > Emails,
- Locate the Ocean Waitlist Notification on your list,
- Click the Manage button next to it to configure the email,
- Apply settings per need and save all changes.


How the Waitlist Works
After enabling the Waitlist module and configuring all email options based on your email template selection (Editor or WooCommerce), the waitlist feature is ready to increase your sales.
The further functionality also depends on whether you're using the default single product template (OceanWP) or have made a custom template for the single product page using Elementor.
Default Single Product Page Template (OceanWP)
If you're using the default WooCommerce single product page which you've styled and customized through the OceanWP Customizer (Customize > WooCommerce > Single Product), then the Waitlist option will be automatically added to the single product page after you have enabled the Waitlist module and configured the email option.
The Waitlist feature will be available to both logged in and logged out customers:
- logged in customers: will see a button to add the out of stock product to the waitlist.
- logged out customers: will see a subscription form in which they'll need to add their email address and subscribe to the Waitlist for the out of stock product in question.
Custom Single Product Page Template
If you made a custom single product page template, you will need to insert the Waitlist button into your template manually.
From the Ocean eComm Treasure Box dedicated widgets for Elementor, find the OceanWP eCommerce Waitlist group and insert the Waitlist Button widget anywhere in your single product page template where you see fit.

After updating the template, the Waitlist option will function exactly as for the default single product page, aka either display a button or a form, depending on the customers logged in status.
How the Waitlist (Waiting List) Email Notifications Work
Email notifications sent to customers on your waitlist are automatic - there's nothing you need to do, except making sure the CRON job responsible for email sending is not stopped or blocked on your website.
This functionality is available through the CRON job called 'oec_waitlist_cron_job' which performs a check every hour by default. Additional check options include twice a day (every 12h) or once a day (once every 24h). If there are any customers to be notified about products which have become available again, this feature will handle task for you.
Once the email notification has been sent, that specific product will be automatically removed from the customer's waitlist.
Create the Main Waitlist (Waiting List) Page
The main Waitlist page is totally optional, so whether or not you'll create it it's entirely up to you.
However, it would be a nice addition for each of your customers to be able to (re)visit their waiting list, and potentially remove products they're no longer interested in or add more products.
The process of creating the main Waitlist page is rather simple. Just create a new page, give it a title you want (for example, Waitlist), correct the slug and then, depending on the builder use the following methods to generate the content:
- Gutenberg (default WordPress editor) or any other page builder, including Elementor: Use the shortcode: [oec_waitlist]
- Elementor only: either the [oec_waitlist] shortcode using the Shortcode widget, or use the Waitlist Page widget for Elementor from the OceanWP eCommerce Waitlist widgets category.
Waitlist page content is dynamic, and its content depends on what your customers have added to their waitlist.

That's it!
Happy website building!